
How To Upload a Dataset in DataPeak
Your first step to exploring insights, building agents, and automating workflows.
Datasets are the foundation of everything inside DataPeak, analytics, agents, dashboards, forecasting, and automation all start with data.
This guide shows you the easiest way to upload your first dataset and where to find it afterward.
1. What Is a Dataset in DataPeak?
A dataset is a structured collection of data created from:
File uploads
Data connectors
AI Data Merge
Forms/Data Sheets
API imports
You can transform, filter, merge, and analyze these datasets across the platform.
2. Upload from the Welcome Page

When new users sign in, the Welcome Page includes a “Get started with DataPeak” block.
This is the easiest and fastest way to upload your first dataset.
Step-by-step: Upload from Welcome Page
Go to the Welcome Page
Under “Get started with DataPeak,” click Upload Dataset
Select your file
DataPeak supports:CSV
Excel (XLSX)
ZIP archives with multiple CSVs
PDF or image files
Add a name and optional description
Click Add
DataPeak will process your file, create a structured dataset, and notify you when it’s ready.
You’ll receive both:
An in-app notification, and
An email notification confirming the dataset is ready to use
3. Upload Through DataPeak Chat
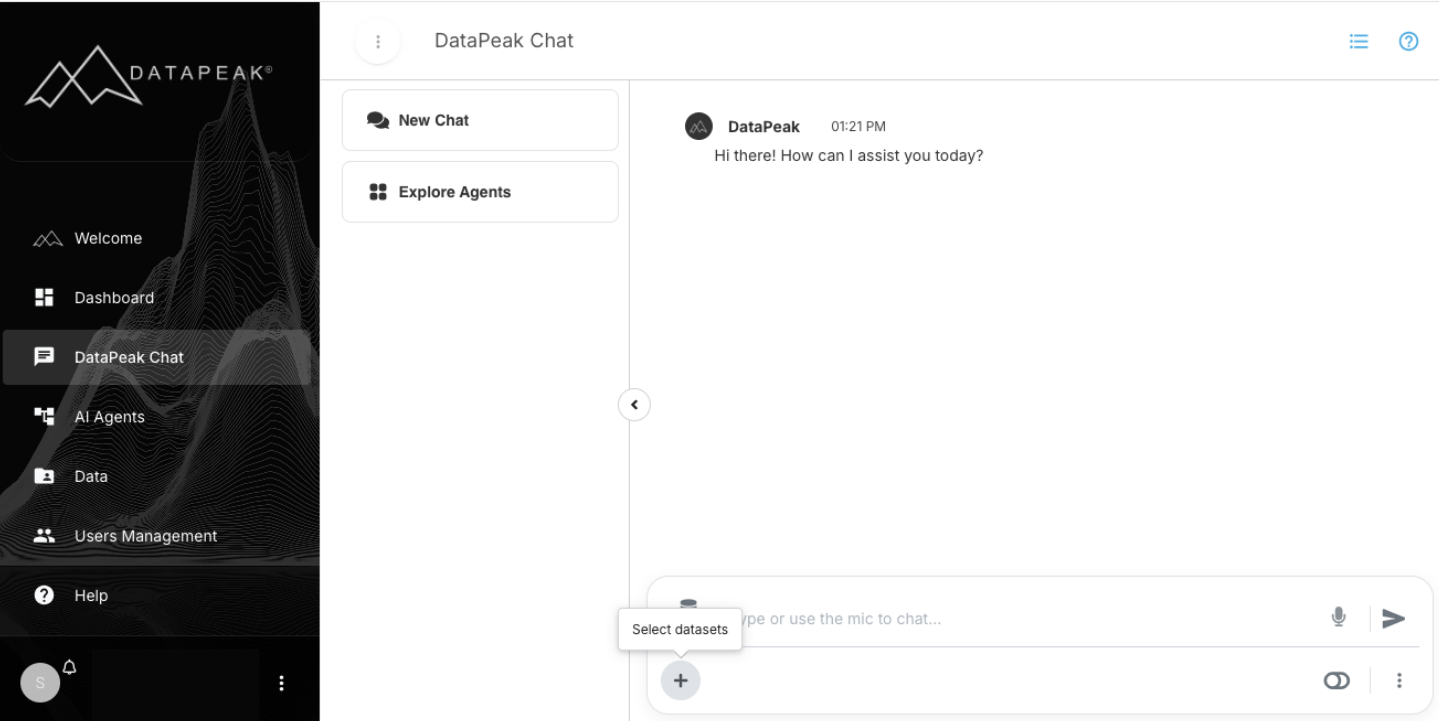
You can also upload data directly in DataPeak Chat.
To upload through Chat:
Open DataPeak Chat
Choose Add Dataset (+)
Select and upload your file
Add a name and optional description
Click Add
You’ll receive both:
An in-app notification, and
An email notification confirming the dataset is ready to use
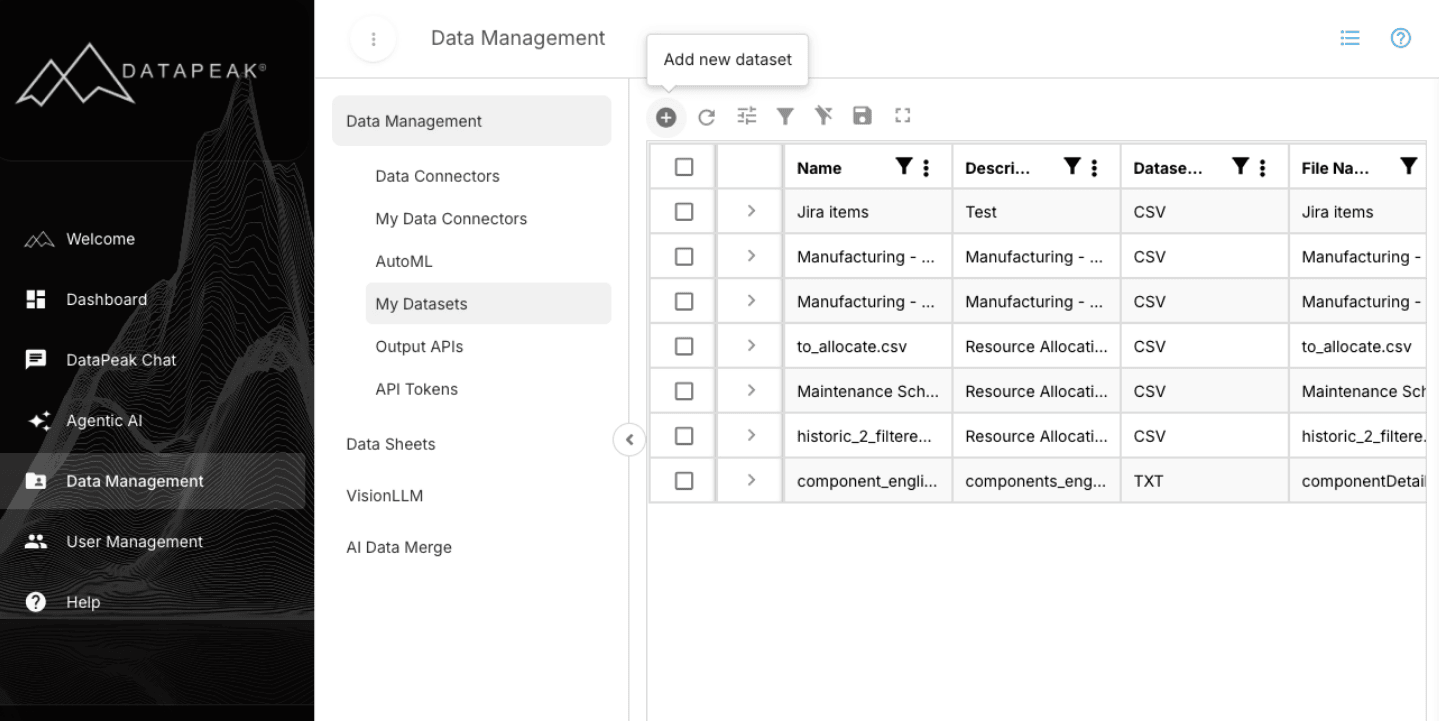
4. Viewing & Managing Your Uploaded Datasets
Once processed, your dataset appears in the Data Management area.
To view your datasets:
Click Data Management in the left-hand menu
Select Datasets
You’ll see a table listing all datasets you’ve uploaded or have permission to view
Columns typically include:
Name
Description
Dataset Type (CSV, Excel, ZIP, PDF, etc.)
File name
Data size
API endpoint
Upload Status
Dataset Status
Owner
Creation Date and
User Hierarchy
This is your central hub for managing datasets.
5. What You Can Do With a Dataset
Once your dataset is uploaded, you can:
Transform & Clean
Filter rows
Rename columns
Calculate new fields
Fix inconsistent data using alias columns
Hide or rearrange columns
Merge Multiple Datasets
Use AI Data Merge to combine files based on matching keys/columns.
Export
Download datasets in:
CSV
Excel
JSON
and more
Tag & Organize
Add tags to categorize datasets for easier searching and grouping.
Refresh Automatically
If your data is coming from a connector, you can:
Schedule automatic refreshes
Trigger refreshes through agents
Sync data from external sources
Lock Editing
Admins can restrict editing or lock specific datasets to prevent accidental changes.
6. Uploading ZIP, PDF & Image Files
DataPeak can extract structured data from:
ZIP files
These typically contain multiple CSVs or data sources.
DataPeak will unpack, process, and unify them into datasets.
PDFs & Images
Using VisionLLM, DataPeak can turn scanned or visual documents into structured datasets you can analyze, merge, or automate.
This is especially useful for:
Invoices
Forms
Industrial equipment reports
Scanned documents
7. Tips for a Smooth Upload
If your file is large, keep the browser tab open until the upload completes
Use clear column names if possible (helps with Chat, analytics, and agent creation)
Remove blank header rows before uploading
If DataPeak detects formatting issues, it will prompt you to correct them
You can upload multiple datasets, there is no limit on the number or size
8. What to Do After Uploading
Once your dataset is ready, most users follow this sequence:
Next recommended steps
Start a Chat about your data
Create an AI Agent using your dataset
Build a Dashboard Chart
Use AI Data Merge if you have multiple files
Your dataset is now the foundation for everything you’ll do next in DataPeak.