
How To Use the Welcome Page
Your guided starting point inside DataPeak.
After you create your account and sign in for the first time, the Welcome Page is the first place you’ll land. Think of it as your home base: it gives you quick access to onboarding steps, templates, and DataPeak’s most powerful features.
This guide walks you through everything on the page so you know exactly where to start.
1. Overview

The Welcome Page is designed to help you get comfortable with DataPeak quickly, whether you're automating workflows, uploading data, or exploring insights with AI.
It includes:
A searchable help bar (“How can I assist you today?”)
Your first four recommended steps (Get started with DataPeak)
Pick up where you left off
Key features you can explore right away
A quick sidebar overview for easy navigation
2. Search Bar / AI Assistant
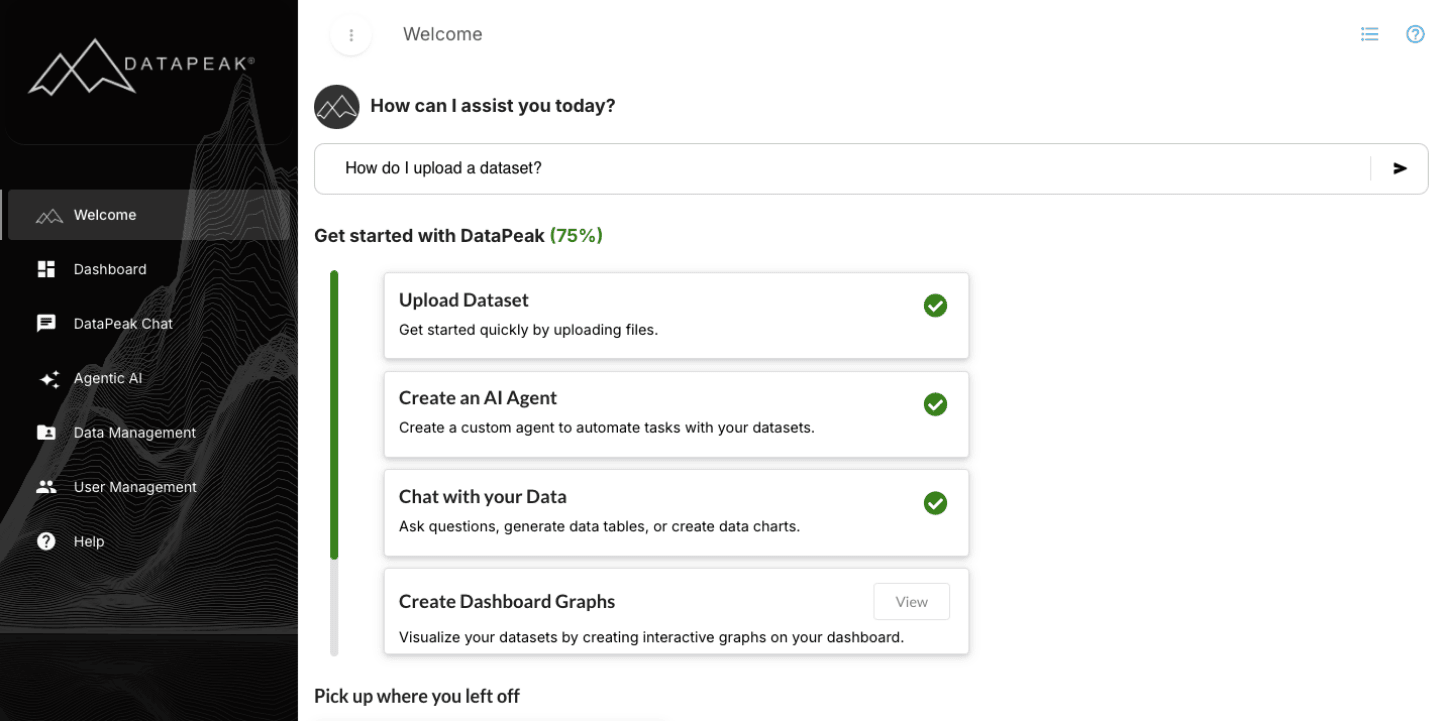
At the top of the page, you’ll see the question:
“How can I assist you today?”
You can type anything here, from questions, simple commands or specific tasks:
“How do I upload a dataset?”
“I’d like to chat with the data”
“Let’s create a Hierarchy”
This search/assistant bar is a fast way to move around the platform or get help without digging through menus.
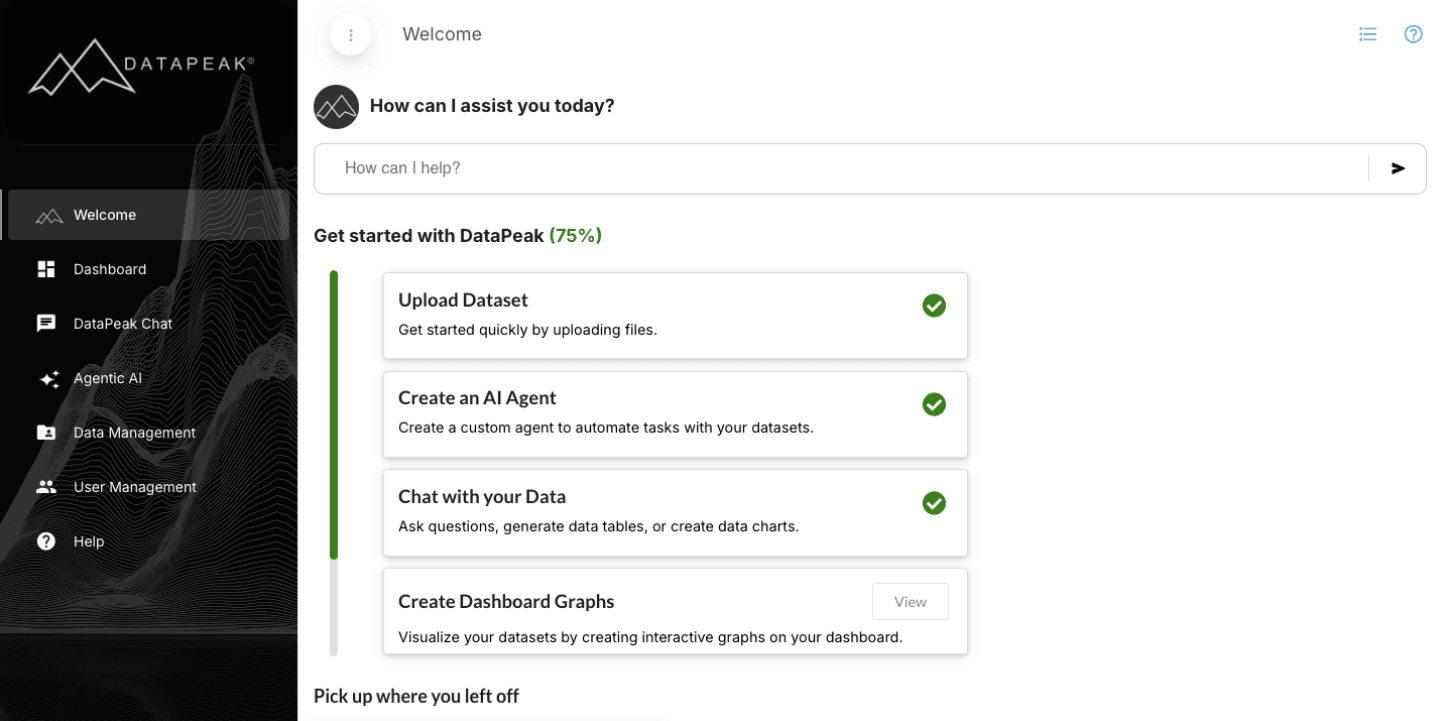
3. Get started with DataPeak (Onboarding Progress)

Below the search bar, you’ll see:
Get started with DataPeak (XX%)
This percentage reflects your progress through the four core onboarding steps most new users complete:
Upload Dataset
Create an AI Agent
Chat with Your Data
Create Dashboard Graphs
When you complete any of these actions, your progress updates automatically.
This helps new users understand where they are in the setup process, and what to try next.
When these four actions are completed, these blocks disappear from the Welcome Page. You may continue to these features by choosing them from the Explore Key Features section at the bottom of the Welcome Page.
4. Your First Four Steps
These four cards guide you through the typical first actions inside DataPeak.
1. Upload Dataset
Add your first dataset to start exploring insights or building AI-driven workflows.
Click Upload to import files (CSV, Excel, PDF, images, etc.).
Recommended first use: Upload a simple CSV or Excel file, something familiar, to see how DataPeak works with your data.
2. Create an AI Agent
Agents automate tasks, manage workflows, and handle multi-step operations with your data.
Click Create to open the Agent Builder.
Recommended first use: Try creating a simple agent using one of the starter templates or recommended agent types.
3. Chat with Your Data
Ask questions, analyze tables, or generate charts, all in natural language.
Click Start to chat directly with your uploaded datasets.
Recommended first use: Ask a simple question like “What were my top performing categories last month?”
4. Create Dashboard Graphs
Build visual charts and dashboards to track trends, monitor KPIs, and explore insights from your data.
Click DataPeak Chat in the left-hand menu to begin.
Recommended first use: Start a new chat, switch to Data Mode, choose your dataset, and generate an Advanced Graph. Once the chart appears, click Save to add it to your dashboard.
5. Explore Key Features
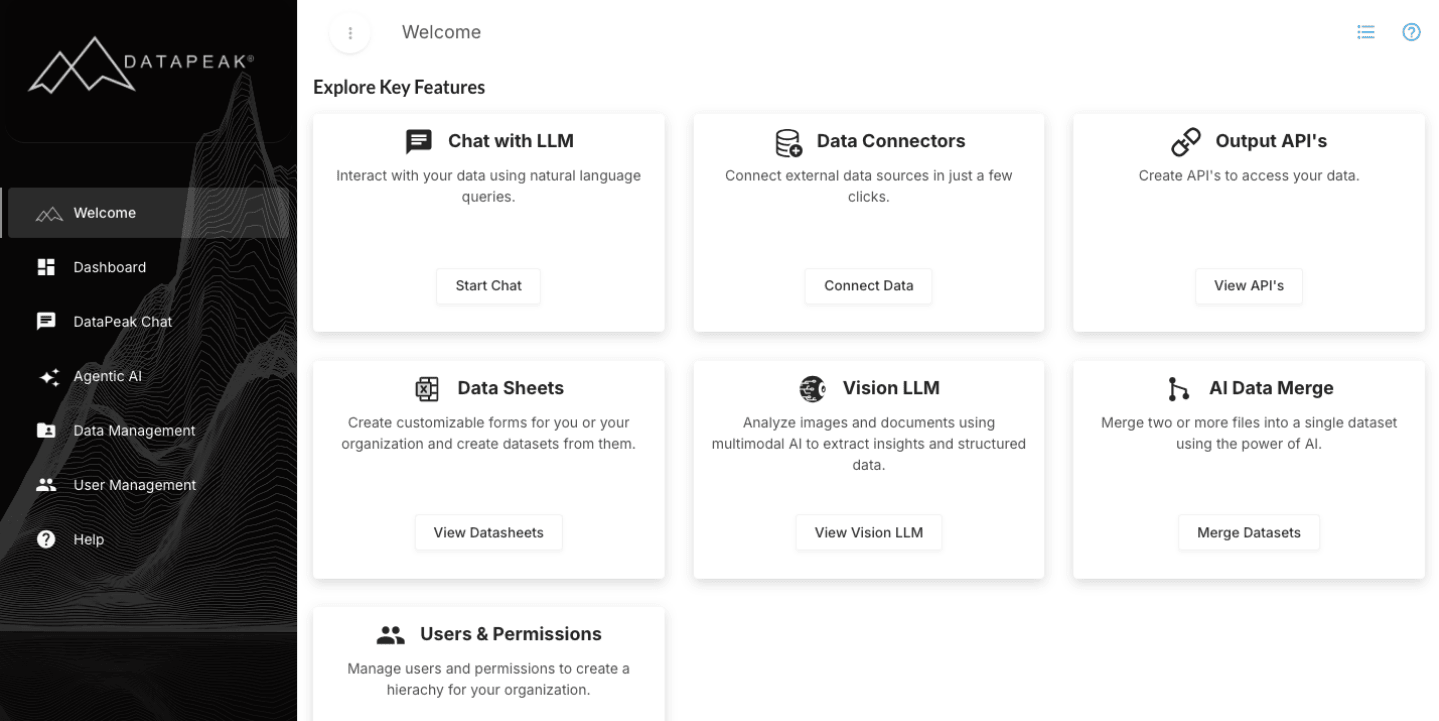
This section gives you faster access to DataPeak’s core capabilities. Each card leads to a key feature area inside the platform.
Below is a short description of each feature plus when to use it first.
Chat with LLM
Use natural language to explore data, debug issues, ask questions, or get help.
First Use: Try asking about your dataset or workflow idea.
Data Connectors
Connect DataPeak to external systems — ERPs, CRMs, databases, cloud apps, and more.
First Use: Browse connectors to see what systems your team can integrate automatically.
Output APIs
Turn your AI agents into secure APIs that other apps or systems can call.
First Use: Explore how to send agent output to external tools such as dashboards, CRMs, or automation platforms.
Data Sheets
Create smart forms for collecting structured inputs from team members or customers.
First Use: Try creating a simple survey or input form to see how DataPeak turns form responses into datasets.
Vision LLM
Analyze images and documents using multimodal AI to extract insights and structured data.
First Use: Upload a PDF, scanned document, image, or report, and ask the system to extract key fields or summarize the content.
AI Data Merge
Combine multiple files or datasets into a single structured dataset using AI.
First Use: Merge two similar spreadsheets (e.g., monthly reports) to see automatic alignment.
Users & Permissions
Manage user accounts, roles, and access controls.
First Use: If you’re an admin, review your role settings and invite team members.
7. Left Sidebar Navigation (Quick Overview)
The left sidebar gives you consistent access to all major areas of the platform:
Welcome — Home base and onboarding hub
Dashboard — High-level overview of your data and agents
DataPeak Chat — Conversational interface for natural language exploration
Agentic AI — Build, manage, and customize AI agents
Data Management— Upload, organize, and configure datasets
User Management — Invite users, set permissions and build your organizational hierarchy
Help — Direct access to the FAQ and support materials
This sidebar is the fastest way to move around DataPeak as you get familiar with the platform.
8. What to Do Next
Most users follow this sequence:
Upload a Dataset
Create Their First Agent
Chat with Their Data
Explore a Template
Connect external data sources
Build workflows or APIs
Each of these actions is covered in its own dedicated How-To page.
You're now ready to use the Welcome Page as your launchpad for everything DataPeak can do.